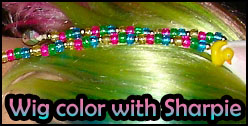
So far, I have done all of my wig coloring with Sharpie markers. I have heard of several other methods that you can use to achieve this including Copic Color Markers (a bit more pricey than Sharpies) and FW Acrylic Artist Ink. Since my experience is with Sharpie, that's what this tutorial will be based on. As I use these other techniques, I will add on to this tutorial.
First of all, I suggest trying to find a wig in the color you need. What you look for depends on your skill level and comfort in styling and/or cutting a wig. If you are more comfortable with
doing those things, then your options a lot more broad. For example, you can cut long wigs for a short style, or straighten a curly wig if it happens to be the correct color you need. No mater how many times
I've washed a wig dyed with sharpie at least some of the color will come off if it's rubbing on your costume all day.
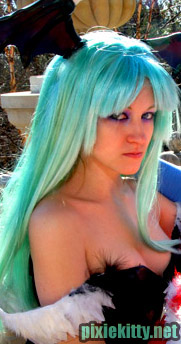
I dye wigs with Sharpie when I absolutely can't find the correct color of wig, or if I need a specific multi-color wig. It's also nice if you have an old light-colored wig lying around, and you don't have the money to buy a new wig in a different color. Another thing I like to use Sharpie for is to darken the color or change the tint of a wig.
You will need:
16 oz. bottle of 70% isopropyl alcohol (less or more depending on what you're coloring)
Sharpies of the color(s) you want for your wig (number varies on wig and desired darkness)
Spray bottle or large/medium paintbrush (see tutorial below)
Exacto knife
pliers
latex gloves
Base wig (I usually check E-bay or Amphigory)
Important things to remember:
* You cannot lighten a wig with sharpie - you can only add color or darken. Because of this fact, it's good to start out with an all-white wig or a light colored wig similar to the color you want. (Ex. - you
need a dark blue wig, so you could start out with a sky blue wig)
*Do this process in a well-ventilated area (outside is best if possible). Otherwise, you will stink up your whole house with headache inducing sharpie-alcohol fumes, and probably kill a few brain cells
at the same time!
*The dye mixture you make WILL stain clothing, floors, and surfaces such as counter tops. Be sure to cover your work area with something like aluminum foil, or Saran Wrap with newspaper on top. Wear gloves to prevent your hands from looking ridiculous for a week. You can find disposable latex gloves in the cleaning section at the store.
Coloring a solid color:
(left wig started out as a light silver-gray, right wig base was white)
1. Get your wig base
I prefer to start with white, however starting with a light version of a color that is close to you want will work too. In fact, using a color that is similar may reducing the hassle or trying to get EVERY
strand of the wig to color as it will blend better.
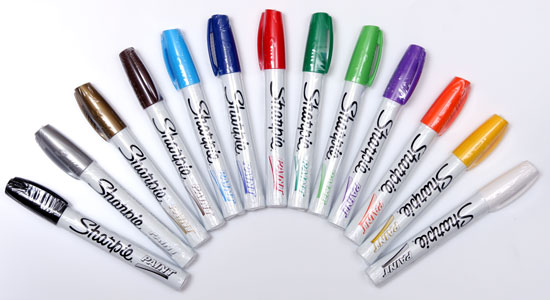
2. Decide on the colors of Sharpie you will need to mix together to achieve your desired look
This sometimes take a little trial and error. Sometimes you can find a single Sharpie in the perfect color, so you can just buy multiple of the same color to make your dye. Otherwise, you'll need to buy different shades/colors and mix them together. A good place to look for single
Sharpies in various colors is A.C. Moore. They have a nice selection to choose from. You can also find a large selection of colors online at sharpie.com.
3. Make your dye mixture
Wear gloves for this part - it's messy. I use a pair of pliers to pop the ends of the sharpies off, then pull out the ink roll thing. Slit it down the side with an exacto knife to expose the dye. Place this
into a bottle that you can cap for mixing/shaking (I usually put them straight into the spray bottle I will be using)
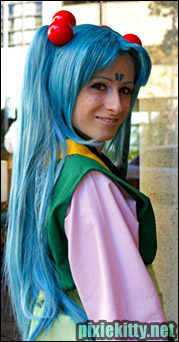
The amount of markers you need depends on how intense/dark you want your color to be, and the length/thickness of your wig. For my Sasami wig (pictured above on the left), I used about 7 Sharpies.
You will be washing the wig between colorings, so you will have dye it multiple times until you achieve the desired intensity of color. This is also sort of something that is trial and error. I generally found that a medium length wig uses about 5-7 sharpies to make a fairly concentrated mixture.
I use 70% isopropyl alcohol ("rubbing alcohol"). This is the stuff you find in the band aid/first aid section of most department stores. It's very low cost, and generally comes in 70% and 90%. The 90% concentration is good for stripping coloring - sometimes a good tool if you mess up and want to take the sharpie color OUT of your wig. The average bottle size is about 16 oz. A full 16 oz bottle is typically enough to dye a medium-long length wig, however once again, it will depend on how thick the wig is, and also how dark you'd like it to be. If your wig is super long (past your shoulders) you may need more alcohol. Using abut 10 sharpies with 16oz should get you a pretty dark color, but you may have to start with less and work your way up until you get the color you want for your wig. 8 oz. of alcohol with 5-7 Sharpies is generally good for shoulder length wigs or shorter.
Place the slit sharpie ink strips into a bottle/container that you can seal with a lid, pour in your alcohol, place lid on container, and shake! I let this mixture sit for several hours, sometimes over night
- shaking periodically. The soaking and shaking help to let the ink come out into the mixture. You can also use a pair of pliers and squeeze some of the ink out into the alcohol if you're impatient. I
recommend testing your dye on a small section of hair under the wig to be sure it's the correct color. If it's too dark, add more alcohol to dilute, and if it's too light, add a more sharpies.
(A good way to make a small test swatch on your wig is to dip an old paint brush into the dye and use it to rub a little dye under the wig)
In the past, I have mixed a little water with this mixture to dilute it more if I run out of alcohol - I haven't noticed an adverse effect to this, but I don't think most people use water in their mix.
4. Add the dye to your wig
You can spray the dye mixture onto you wig with a spray bottle or, if you have enough dye, you can soak the wig in a large bowl or bucket. This is really up to you. Again, this process is very messy, do
it outside if at all possible - this will also help with the fumes. Let the wig dry completely before moving on to the next step.
Do not hang the wig up for drying - this will allow dye to drip off making the top lighter and ends darker. Instead, lay the wig out flat on a sheet of plastic or tarp. It usually will take overnight for the
wig to completely dry.
5. Wash your wig
After it's dry, wash your wig with cold water until the water runs clear. Letting the wig dry again will allow you to see any spots that you missed or have faded during the wash. Some wigs take several
repeat dyes and washings to get your desired effect, so be patient!
My trick: Sometimes if I run out of sharpies and get low on the dye I originally made, I will add a little water/alcohol to the left over color and shake. This makes a little more dye to touch up little spots you miss at the end of your dye job.
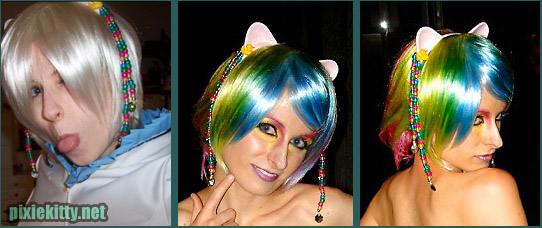
Coloring a wig with Multiple colors:
Chin length or shorter- I tend to just hand color with the Sharpie marker itself. I start with a white wig base so that all my colors will be uniform. It would just be too difficult to spray streaks of color like this.
Example:
Shoulder length or longer: I create the same dye mixture as mentioned above with the same steps. Instead of spraying it on or soaking the wig, I actually use a medium/large width paint brush (depending on the look you need) to paint the different colors onto the wig.
Sometimes I use this method on shorter wigs also if I have a lot of area to color with one color.
A good example of that is my Tira wig:
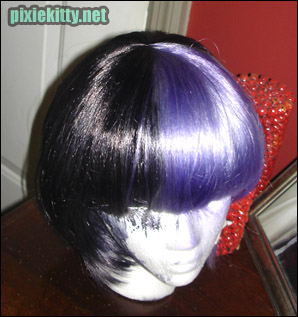
This wig started out as a white 'Lulu' wig from Amphigory
In the past, I have worn my multi-color wigs without washing them in cold water.. I have only done this with short wigs that don't really rub on my costumes. My concern was that the colors would smudge/run together during the washing
However, I plan on washing the next one I make to see how things turn out. I'll be sure to update with how that goes when I get there!